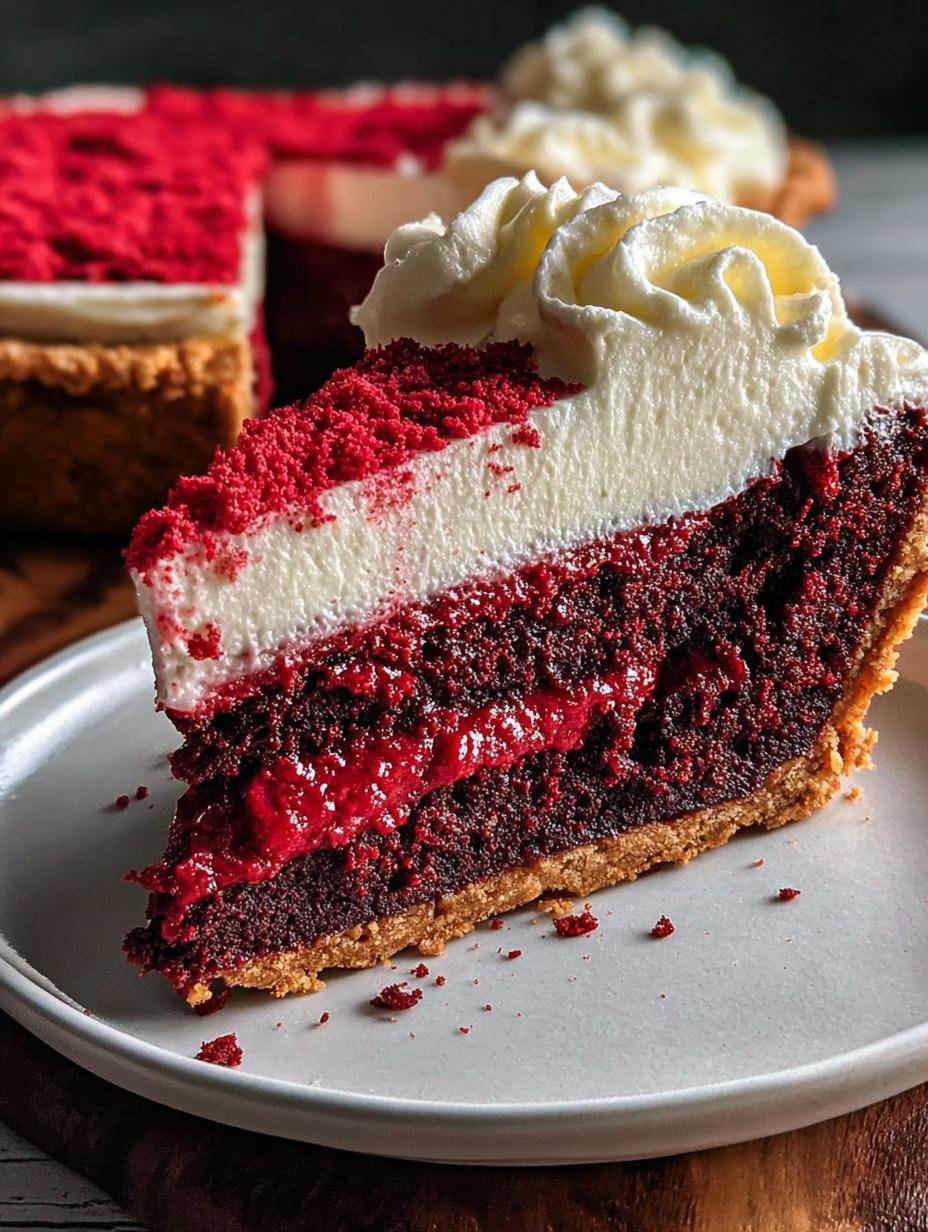
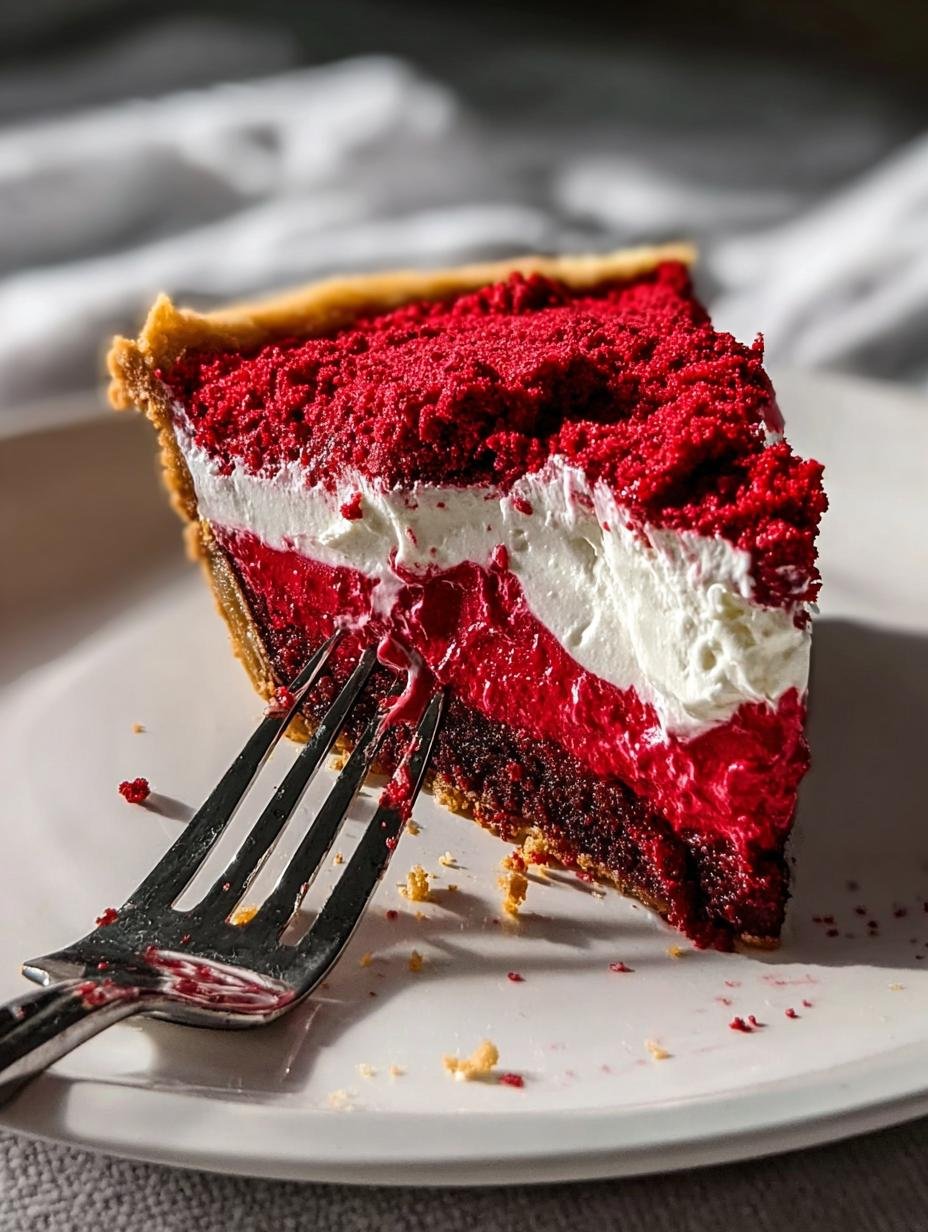
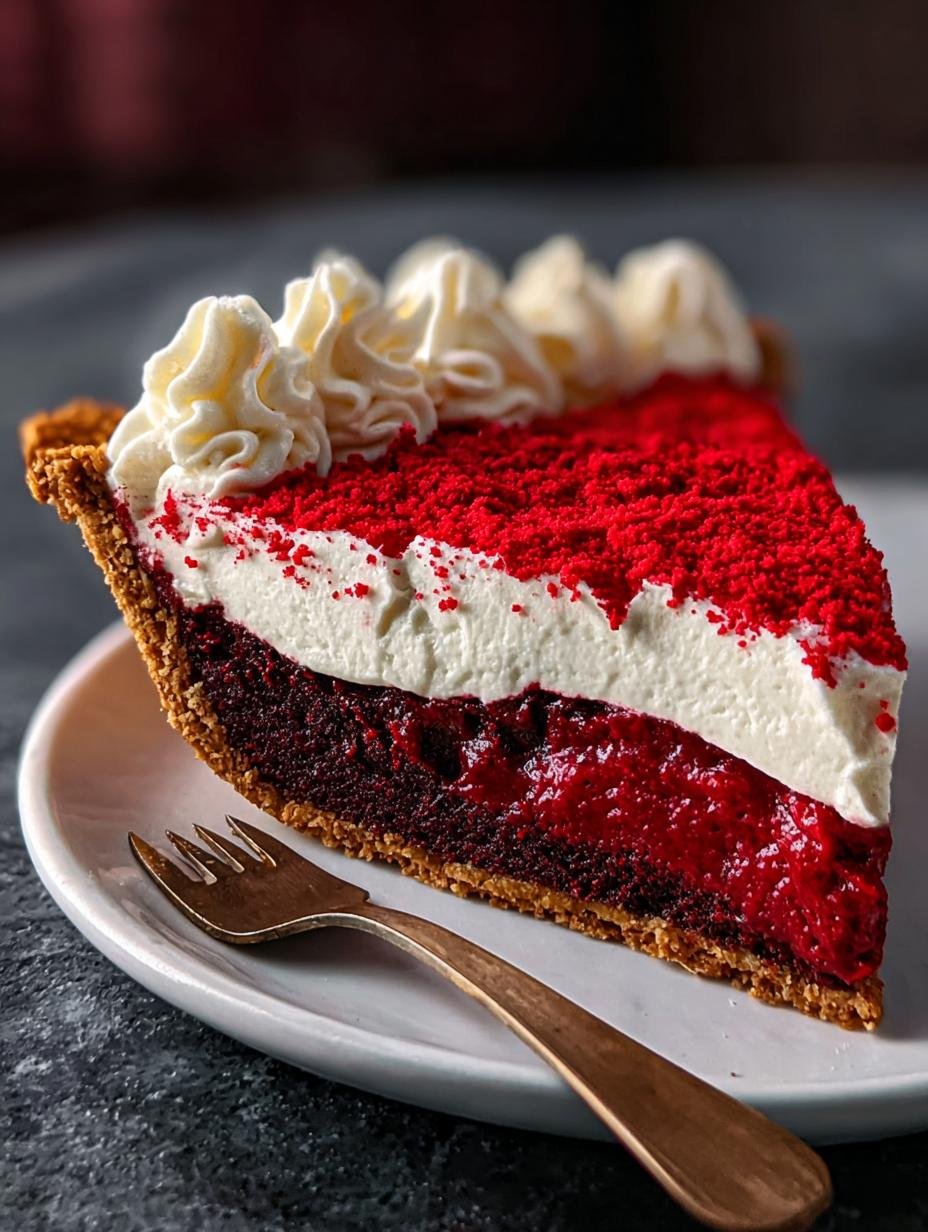
Red velvet brownie pie has been my ultimate indulgence for years! I first tried a version of this dessert at a friend’s potluck, and the combination of rich, fudgy brownie batter baked into a flaky pie crust was pure magic. The vibrant red color and the deep chocolatey aroma instantly drew me in. It’s the perfect marriage of two classic desserts, offering that satisfying chewiness of a brownie with the comforting structure of a pie. It’s truly a showstopper, whether you’re celebrating a holiday or just need a serious treat. Let’s get baking this amazing red velvet pie!
Why You’ll Love This Red Velvet Brownie Pie
You’re going to adore this dessert for so many reasons! It’s a truly decadent dessert that hits all the right notes.
- It’s the perfect fusion of two beloved treats: brownies and pie!
- The texture is amazing – fudgy, chewy brownie filling in a flaky crust.
- That vibrant red color is absolutely stunning for any occasion.
- It’s surprisingly simple to make, making it an easy red velvet brownie pie for busy bakers.
- The deep chocolate flavor is intensely satisfying.
- It’s a guaranteed crowd-pleaser that will impress your guests.
- It’s versatile enough for holidays, birthdays, or just a Tuesday treat.
- The optional toppings add an extra layer of deliciousness.
Ingredients for Red Velvet Brownie Pie
Gather these simple ingredients to create your stunning Red Velvet Brownie Pie. You might be surprised how many of these pantry staples you already have on hand!
- 1 unbaked 9-inch pie crust – use your favorite store-bought or homemade crust for a perfect base
- 1/2 cup (115 g) unsalted butter, melted – this provides richness and helps create that fudgy texture
- 1 cup (200 g) granulated sugar – for sweetness and structure in the brownie filling
- 1 teaspoon vanilla extract – essential for that classic warm flavor
- 1 tablespoon unsweetened cocoa powder – deepens the chocolate flavor, making it incredibly rich
- 1 tablespoon red food coloring (liquid or gel) – this gives our pie its signature vibrant color; gel provides a more intense hue
- 1 teaspoon white vinegar – it might seem odd, but this helps activate the red food coloring and adds a slight tang, similar to how it’s used in some quick breads or even a creamy enchilada sauce
- 2 large eggs – they bind everything together and contribute to the fudgy, brownie-like consistency
- 3/4 cup (95 g) all-purpose flour – the perfect amount for that chewy brownie texture without making it cakey
- 1/4 teaspoon salt – balances the sweetness and enhances all the other flavors
- Optional toppings: Cream cheese frosting, Powdered sugar for dusting, Whipped cream or vanilla ice cream for serving

How to Make Red Velvet Brownie Pie
Get ready to whip up the most incredible dessert! Making this Red Velvet Brownie Pie is easier than you think, and the results are absolutely stunning. Follow these simple steps for a truly decadent treat.
- Step 1: Preheat your oven to 350°F (175°C). Take your unbaked 9-inch pie crust and place it gently into a 9-inch pie dish. Crimp the edges to create a beautiful border, then set it aside.
- Step 2: In a large mixing bowl, combine the melted butter and granulated sugar. Whisk them together until the mixture becomes smooth and glossy – it should look like a rich, liquid gold.
- Step 3: Crack in the two large eggs, adding them one at a time. Whisk well after each egg is incorporated. This ensures everything emulsifies beautifully, contributing to that fudgy texture.
- Step 4: Stir in the vanilla extract, unsweetened cocoa powder, red food coloring, and white vinegar. Mix until everything is fully combined and you have a vibrant, smooth batter. It should smell wonderfully chocolatey!
- Step 5: Sift in the all-purpose flour and salt. Gently fold them into the wet ingredients using a spatula until just combined. Be careful not to overmix; we want a tender, chewy brownie pie, not a tough one.
- Step 6: Pour this luscious batter into your prepared pie crust. Use your spatula to spread it evenly, ensuring it reaches all the edges. The batter will be thick and rich, promising a fantastic dessert.
- Step 7: Bake for 30–35 minutes. You’ll know it’s ready when the center is just set but still has a slight wobble. A toothpick inserted near the center should come out with a few moist crumbs attached, not completely clean. The aroma filling your kitchen will be heavenly. This method is quite similar to how you might make an easy creamy white sauce, focusing on gentle heat and precise timing.
- Step 8: Carefully remove the pie from the oven and place it on a wire rack. Let it cool completely for at least 1 hour. This cooling time is crucial for the pie to set properly, much like letting a creamy chicken sauce recipe rest before serving.
- Step 9: Once cooled, you can add your favorite toppings! A swirl of cream cheese frosting or a delicate dusting of powdered sugar looks stunning. Serve slices with a dollop of whipped cream or a scoop of vanilla ice cream for the ultimate decadent dessert experience.
Pro Tips for the Best Red Velvet Brownie Pie
Want to elevate your Red Velvet Brownie Pie from great to absolutely unforgettable? I’ve picked up a few tricks over the years that make all the difference. Follow these tips for a dessert that’s truly next level!
- For that signature deep red color, opt for gel food coloring. A little goes a long way and provides a much more vibrant hue than liquid versions.
- Don’t overmix the batter once you add the flour. Overmixing develops gluten, which can lead to a tougher brownie pie instead of that desired fudgy texture.
- Allowing the pie to cool completely is crucial. It needs time to set properly, ensuring clean slices and that perfect, dense brownie consistency.
- If you want a tangier flavor profile, consider adding a touch more vinegar, but be careful not to overdo it.
What’s the secret to perfect Red Velvet Brownie Pie?
The secret lies in balancing the brownie’s fudgy richness with the red velvet’s subtle tang and vibrant color. Using gel food coloring and not overmixing the batter are key. It’s a technique similar to how one might achieve an authentic Mexican white sauce, focusing on precise ratios for the best texture and flavor.
Can I make Red Velvet Brownie Pie ahead of time?
Absolutely! You can prepare the pie up to 24 hours in advance. Bake it completely, let it cool, and then cover it tightly. Store it at room temperature or in the refrigerator. It holds up wonderfully!
How do I avoid common mistakes with Red Velvet Brownie Pie?
The most common pitfalls are overbaking, which leads to a dry pie, and overmixing the batter, resulting in a tough texture. Always rely on the toothpick test – a few moist crumbs mean it’s perfect!
Best Ways to Serve Red Velvet Brownie Pie
This decadent Red Velvet Brownie Pie is a dessert star on its own, but a few thoughtful pairings can elevate it even further. Imagine serving a slice warm, with a dollop of fluffy whipped cream or a scoop of cool vanilla ice cream melting into the rich chocolate. For a truly festive presentation, a dusting of powdered sugar or a swirl of cream cheese frosting adds both visual appeal and extra flavor. While this pie is sweet, you might be surprised how a touch of savory can complement it. Think of it like a unique dipping sauce; perhaps a very subtle, spicy white sauce Mexican style could offer an unexpected but delightful contrast, or even a creamy taco sauce could add a surprising twist to the dessert experience.

Nutrition Facts for Red Velvet Brownie Pie
This decadent Red Velvet Brownie Pie is a treat to savor! Here’s a look at the estimated nutritional breakdown per serving. Remember, these figures can vary slightly based on the exact ingredients and optional toppings you choose.
- Calories: 320
- Fat: 16g
- Saturated Fat: N/A
- Protein: 4g
- Carbohydrates: 42g
- Fiber: 1g
- Sugar: 28g
- Sodium: N/A
Nutritional values are estimates and may vary based on specific ingredients and portion sizes used.
How to Store and Reheat Red Velvet Brownie Pie
Once your amazing Red Velvet Brownie Pie has cooled completely, it’s time to think about storing any leftovers – though I doubt you’ll have many! To keep it fresh for up to 3-4 days, cover the pie tightly with plastic wrap or foil and store it at room temperature if it doesn’t have a frosting that requires refrigeration. If it’s frosted with cream cheese frosting, pop it in the fridge. For longer storage, freezing is a fantastic option. Wrap individual slices securely in plastic wrap, then in aluminum foil, and freeze for up to 3 months. This makes for a quick dessert fix later!
When you’re ready to enjoy a slice that’s been stored, reheating is simple. If it was refrigerated, you can warm it gently in a low oven (around 300°F or 150°C) for about 5-10 minutes, or until just warmed through. If reheating from frozen, let it thaw in the refrigerator overnight first. This pie is so delicious, you’ll want to ensure you have a plan for storing it, much like how you’d carefully manage the storage of ingredients for a creamy Mexican white sauce to keep it fresh.
Frequently Asked Questions About Red Velvet Brownie Pie
What is Mexican white sauce and what is it used for?
Mexican white sauce, often called “salsa blanca,” is a creamy, flavorful sauce popular in Mexican and Tex-Mex cuisine. It typically starts with a base of mayonnaise or sour cream, blended with ingredients like jalapeños, cilantro, lime juice, garlic, and sometimes cheese or milk for a thinner consistency. It’s incredibly versatile and perfect as a dipping sauce for chips, a topping for tacos, or a drizzle on enchiladas. Learning how to make Mexican white sauce is simple and opens up a world of flavor!
How do you make Mexican white sauce?
Making Mexican white sauce is straightforward! A common method involves blending mayonnaise or sour cream with lime juice, chopped cilantro, minced garlic, and a finely diced jalapeño (seeds removed for less heat). Some recipes add a splash of milk or even a bit of queso fresco for extra creaminess. You can adjust the seasonings to your preference, making it as spicy or mild as you like. It’s a fantastic way to add a zesty, creamy element to many dishes.
Can I substitute anything for the red food coloring in this Red Velvet Brownie Pie?
While the red food coloring is key to the “red velvet” identity, you can get creative. For a natural alternative, beet powder or puree can impart a reddish hue, though the flavor might be slightly altered. If you skip the coloring altogether, you’ll still have a delicious fudgy brownie pie, just without the signature color! It will still be a fantastic, decadent dessert, even if it doesn’t have that vibrant red.
Is this Red Velvet Brownie Pie similar to a red velvet cake?
It shares the iconic red velvet flavor profile – that classic chocolatey taste with a hint of tang – but the texture is distinctly different. Instead of a light, airy cake, you get the dense, fudgy, chewy texture of a brownie baked into a flaky pie crust. It’s a richer, more indulgent experience than a typical red velvet cake, offering a delightful contrast in textures.
Variations of Red Velvet Brownie Pie You Can Try
This decadent Red Velvet Brownie Pie is already a showstopper, but why stop there? I love experimenting with variations to keep things exciting. Here are a few ideas you might enjoy!
- Dietary Twist: For a gluten-free version, simply swap the all-purpose flour for a good quality gluten-free baking blend. You’ll get that same fudgy goodness without the gluten.
- Spicy Kick: Want to add a little heat? Incorporate a small amount of finely chopped chipotle peppers in adobo sauce into the batter, or even a drizzle of a spicy white sauce Mexican style over the top before serving. It adds a smoky, spicy depth that’s surprisingly delicious with the chocolate.
- Savory Pairing: While unusual for dessert, a touch of savory can be intriguing. Imagine serving this with a mild, creamy enchilada sauce on the side for dipping, offering a fascinating sweet and savory contrast that plays with your palate.
- No-Bake Option: While this recipe is baked, you could adapt the concept by using a crushed cookie crust and a no-bake brownie filling. It’s a great alternative for those hot summer days when you want a treat without turning on the oven.

Red Velvet Brownie Pie: 1 Amazing Fudgy Dessert
- Total Time: 1 hour 50 minutes
- Yield: 8 servings 1x
- Diet: Vegetarian
Description
This Red Velvet Brownie Pie is a decadent dessert that combines the rich, fudgy texture of brownies with the classic flavor of red velvet cake, all baked in a flaky pie crust. It’s a showstopper perfect for holidays, celebrations, or any time you want an indulgent treat.
Ingredients
- 1 unbaked 9-inch pie crust (homemade or store-bought)
- 1/2 cup (115 g) unsalted butter, melted
- 1 cup (200 g) granulated sugar
- 1 teaspoon vanilla extract
- 1 tablespoon unsweetened cocoa powder
- 1 tablespoon red food coloring (liquid or gel)
- 1 teaspoon white vinegar
- 2 large eggs
- 3/4 cup (95 g) all-purpose flour
- 1/4 teaspoon salt
- Optional toppings: Cream cheese frosting, Powdered sugar for dusting, Whipped cream or vanilla ice cream for serving
Instructions
- Preheat your oven to 350°F (175°C). Place the unbaked pie crust in a 9-inch pie dish and crimp the edges. Set aside.
- In a large mixing bowl, whisk together the melted butter and sugar until smooth and glossy.
- Add the eggs one at a time, whisking well after each addition.
- Stir in vanilla extract, cocoa powder, red food coloring, and vinegar until fully combined.
- Sift in the flour and salt, and gently fold until just combined. Do not overmix.
- Pour the batter into the prepared pie crust, spreading it evenly with a spatula.
- Bake for 30–35 minutes, or until the center is just set but still slightly soft. A toothpick inserted into the center should come out with a few moist crumbs.
- Let the pie cool on a rack for at least 1 hour before slicing.
- Once cooled, top with a layer of cream cheese frosting or a light dusting of powdered sugar. Slice and serve with whipped cream or vanilla ice cream.
Notes
- Use room-temperature ingredients for a smooth, even batter.
- Don’t skip the vinegar; it enhances color and tang.
- Check for doneness early; overbaking makes it dry.
- For deeper color, use gel food coloring instead of liquid.
- Cool completely before cutting for neat slices.
- Prep Time: 15 minutes
- Cook Time: 35 minutes
- Category: Dessert, Holiday
- Method: Baked
- Cuisine: American
Nutrition
- Serving Size: 1 slice
- Calories: 320
- Sugar: 28 g
- Sodium: N/A
- Fat: 16 g
- Saturated Fat: N/A
- Unsaturated Fat: N/A
- Trans Fat: N/A
- Carbohydrates: 42 g
- Fiber: 1 g
- Protein: 4 g
- Cholesterol: N/A

